For SEM analysis, specimens should be properly attached on specific mounts (see below) and no loose particles should ever be placed in the microscopes. SEM mounts vary from one microscope brand to another, although the microscopes at the EMC only use two types (M4 threaded Hitachi mounts and 3.2 mm diameter pin stubs):
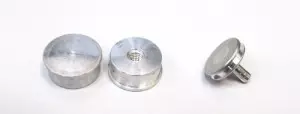
SEM stub mounts
Both types of SEM mounts can be purchased from Ted Pella, Inc. (items #16324 and#16111), SPI Supplies (items #Z01576 and #01506) or Electron Microscopy Sciences (items #75621 and #75170). These basic mounts are inexpensive and will be suitable for the vast majority of specimens. For larger samples or samples with odd shapes, many specialized mounts are available from the three suppliers previously listed. Typically, a new EMC user will be given a couple basic SEM mounts on the first training session, and they can be re-used many times. However, it is recommended to purchase more mounts to be able to store critical specimens without having to un-mount them after each session. The EMC has several specialized mounts and holders (wider, with clamps or pre-tilted) that users can borrow. Please, do not hesitate to ask about these mounts.
Securing a sample onto the SEM mount is another important part of the sample preparation. Typically, an electrically conductive carbon double sided tape is placed onto the mount and the sample is gently pressed onto the surface. Another method is to use a conductive paint (carbon or silver) to attach the specimen. this technique is particularly useful for fragile samples and can also be used to “wrap” non conductive specimens. Always let the paint fully dry before loading the sample in the microscope. Typically, 30 minutes is long enough for the solvents to evaporate, which prevents chamber contamination and imaging issues. Conductive tapes and paints can be purchased from all three vendors listed above (item #16084-3, #16034 and #16051 from Ted Pella, Inc. are good choices). User can use tapes and paints at the EMC to prepare their samples, with help from our staff. However, this preparation needs to be done before scheduled instrument time (please, plan ahead of time).
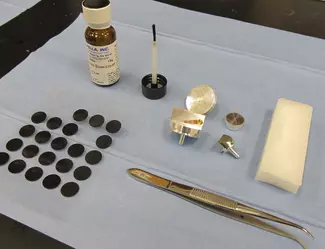
SEM samples being painted with carbon paint